You won’t believe how easy this is! The trick here- you must have access to raw milk. It’s too bad we don’t have more access to farm fresh milk to make cultured cheese, butter and yogurt. There are many health benefits found in fresh milk that has not been pasteurized or homogenized, thereby retaining its healthy living cultures. To read more bout this visit realmilk.com. This recipe is something fun, easy and healthy you can do for your family. I use this yogurt in so many things- pancakes, muffins, salad dressing, dips, smoothies, marinades and on and on! It is a staple for our family, and gives a satisfying feeling to visit the dairy to pick up my fresh supply of jersey milk, create recipes with it while knowing I am doing something to support the health of my family! After you make this save a cup to use to culture your next 1/2 gallon of raw milk, rather than use store bought yogurt the next time!
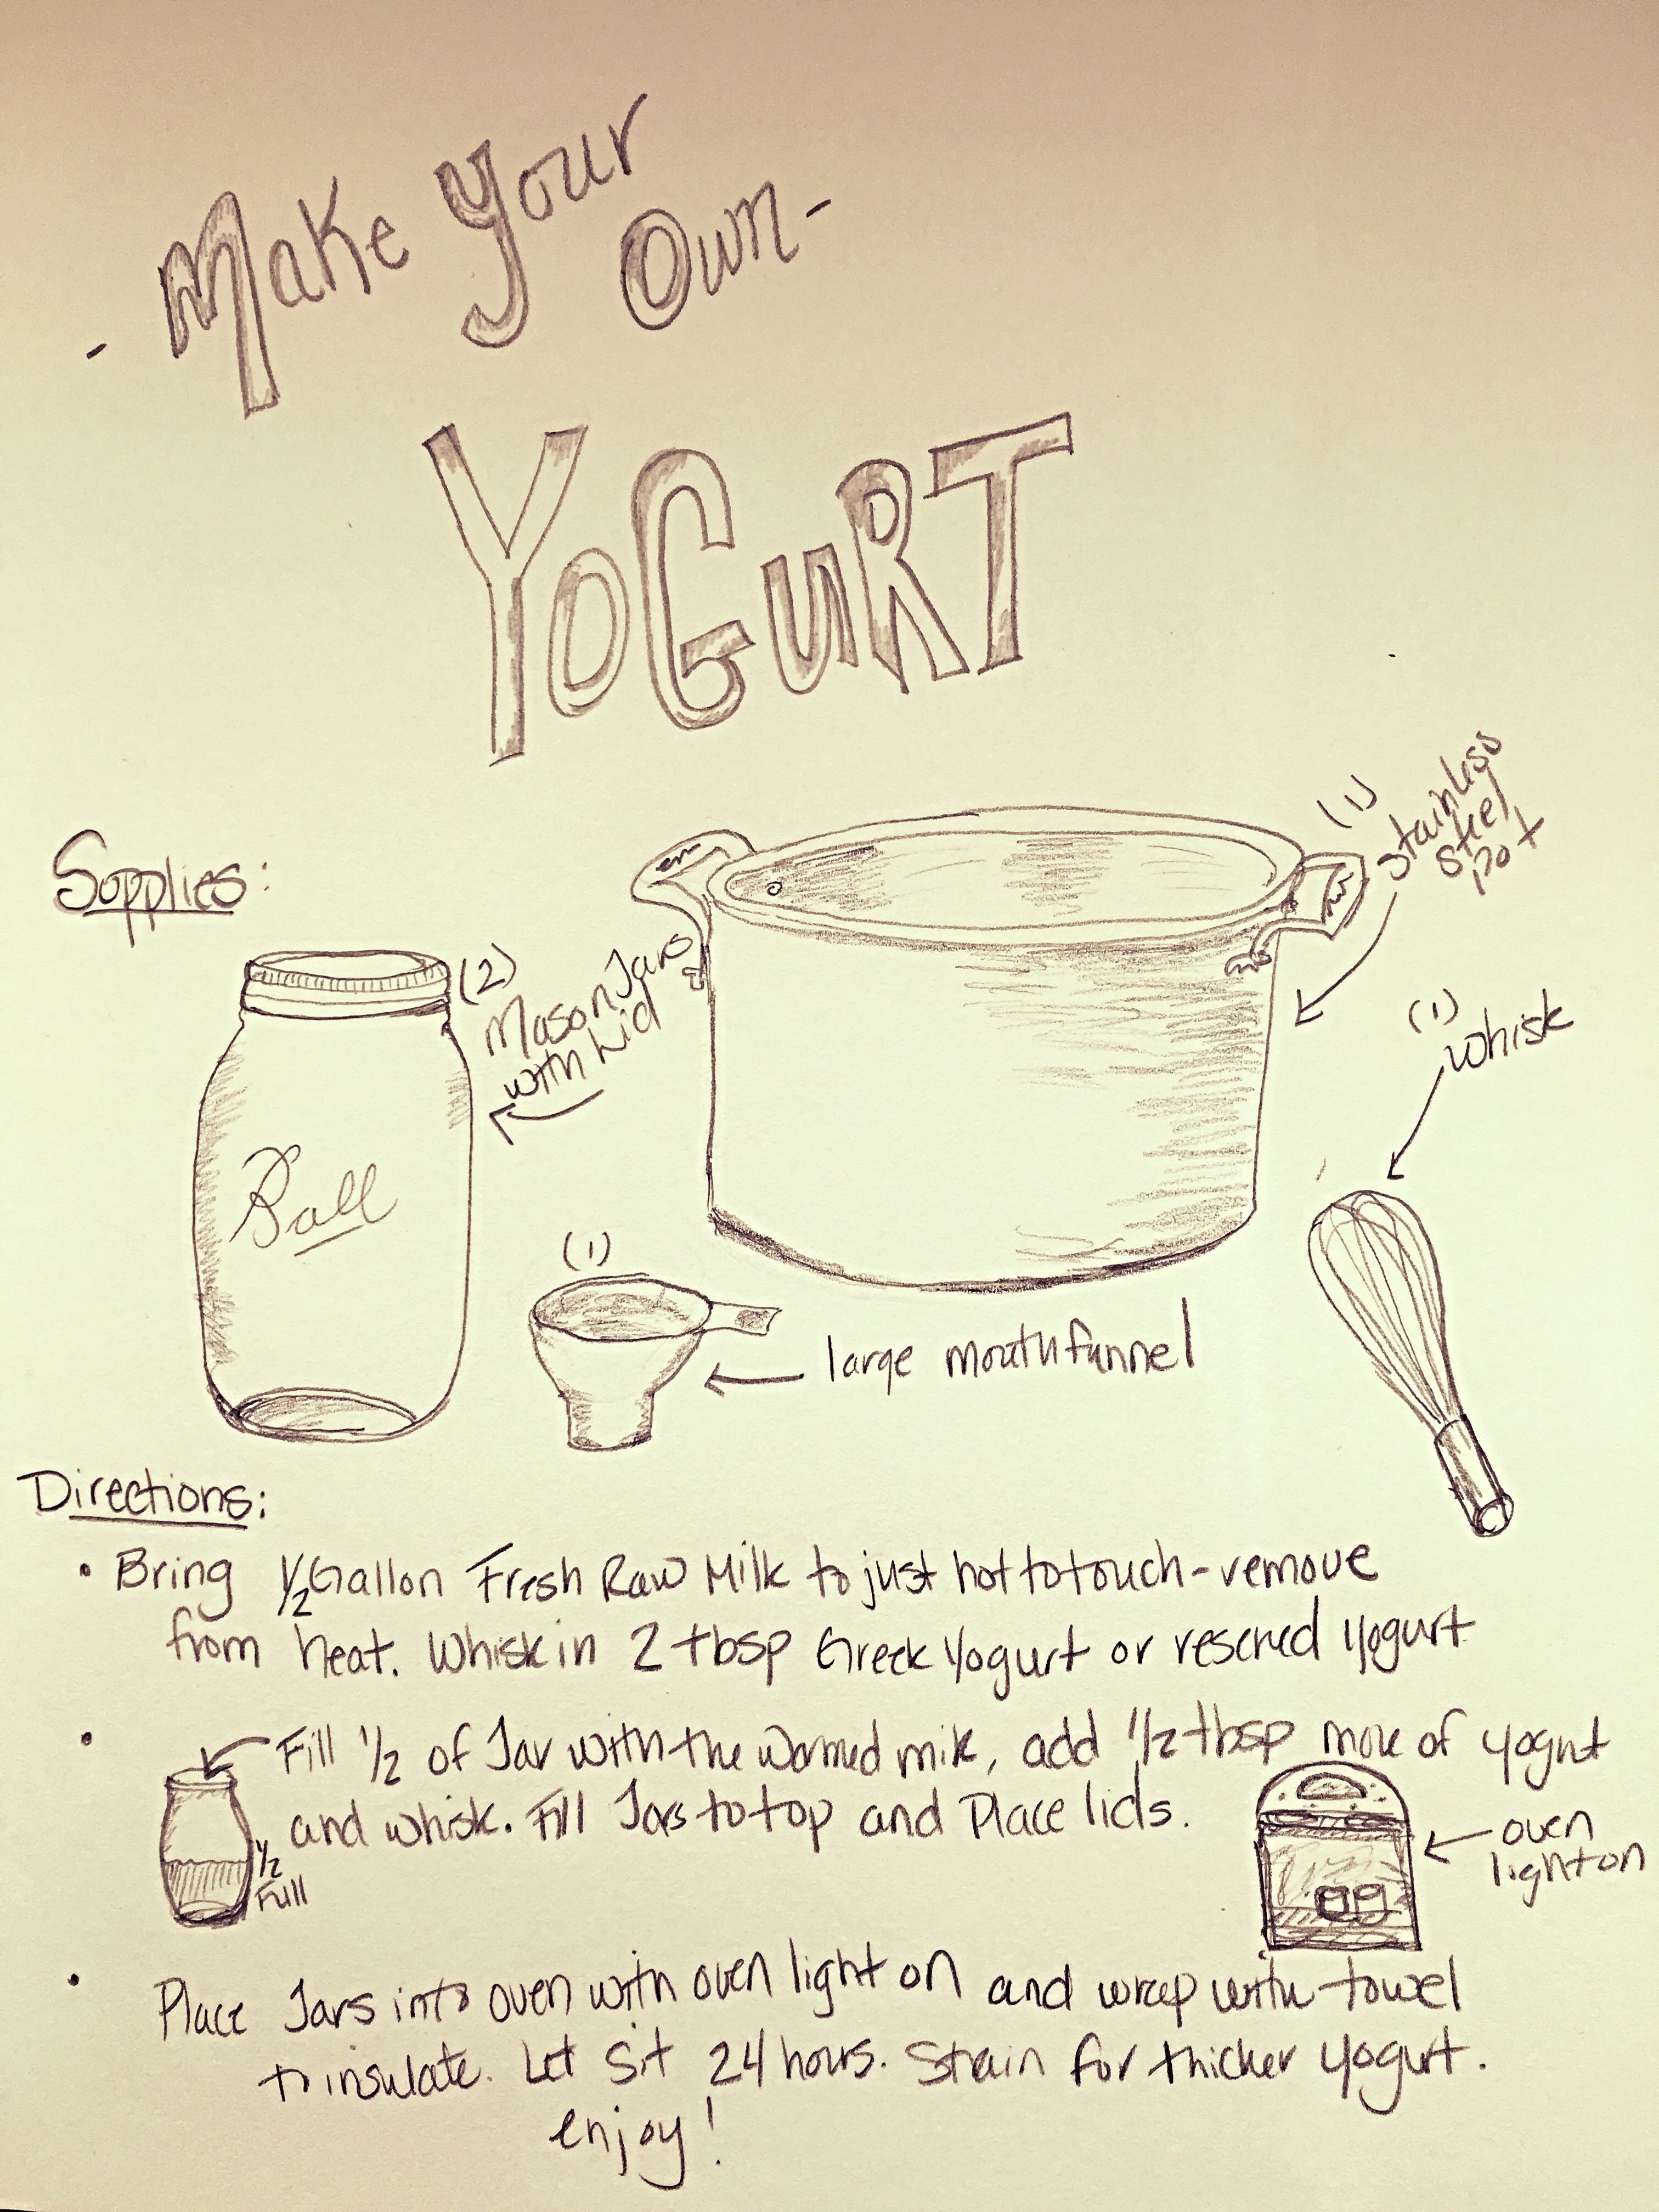
Step 1:
Turn on oven light and gather supplies.
Supplies needed:
- 1/2 gallon raw fresh milk
- Whisk
- Large clean pot
- 2 clean large mason jars with lids
- Funnel ( to make pouring in jars easier)
- 1/4 c plus 4 Tbs high quality plain yogurt ( I like using greek yogurt)
- Oven with oven light and Towel for insulation.
Step 2:
Pour your milk into large pot and heat on medium. (This is hardest part so don’t get sidetracked). Wait until milk is right temperature by using the finger test. (about 8 minutes) That’s right- no fancy thermometers needed!! You will know its right when you test temperature with (clean) finger and feels just to the point of uncomfortably hot! Remove from heat immediately, add 1/4 c of your yogurt and whisk until incorporated.

Step 3:
Add 2 tablespoons of your yogurt to bottom of each empty mason jar. Pour still warm milk until halfway full. Whisk the yogurt and milk together. Add more milk to top of jar. Give another good whisk and repeat with next jar. You will probably have a little left over.

Step 4:
Place lids on jars, put side by side close to oven light. wrap with towel to keep insulated. Close door and leave note with message “do not turn off light or use oven!” Promise you’ll be glad you did, learned this the hard way! Leave in oven for 24 hours. Yogurt will not be consistency of Greek yogurt but thinner. If thicker yogurt is desired place in tea towel and drain off whey over sink for 6-12 hours.Use whey for added nutrition in smoothies or stocks. I have found thinner is the desired consistency to use in recipes.Store in fridge and use within 2 weeks. If there is any question with contamination- funny smell, taste or visible growth discard. Don’t forget to save around a cup of your yogurt to make the next batch!
 I love this pie filling! One because its simple and two because we get to visit Vanderhelm farms down the road to pick our own blue berries! They have amazing blue berries, I try to get lots of sour (green) ones to balance out the sweetness in this pie filling. This is the simplest of all fruit pie recipes because there is no prepping, peeling or pitting of fruit! I use maple syrup instead of sugar to give depth of flavor and also because maple syrup is absorbed much slower in the body than other simple sugars (i.e. refined sugar or honey). Use this with my Yogurt Maple Pie Crust recipe and you will have a true taste of farm home goodness!