I painted this pumpkin platter and made these pumpkin muffins in hopes that fall will come early! A portion of proceeds from this platter goes towards your local food bank and can be purcahsed at ART to FEED website.
I hope to try this recipe with fresh pumpkin from our cousins Pumpkin Patch, but you can also use canned pumpkin as well! My muffin recipes are no fuss, use one bowl and make your life easier please and have fun cooking! Muffins give so much room for creativity to add you own twist as well. I added my Raw Yogurt and some almond butter that give these muffins a super moist texture. For a healthier muffin you can omit the topping. Purchase almonds for a good cause through Farm to Kids and make your own almond butter as well! These freeze well for busy mornings and this recipe makes enough to share with neighbors and spread the love for all things pumpkin! Makes approx 24 muffins.

Ingredients
- 3 C Flour
- 1 tsp Salt
- 1 1/4 tsp Baking Powder
- 1 1/4 tsp Baking Soda
- 1 tsp Cinnamon
- 1 3/4 C Sugar
- 1 tbsp Maple Syrup
- 1/2 C Butter
- 1/4 C Yogurt
- 1/4 C Almond Butter
- 1 15 oz Can Pumpkin or 2 C Fresh Pumpkin Puree
Topping
- 1 tbsp Pumpkin Puree
- 1 tbsp Vanilla
- 2 c Oats
- 1 tsp Salt
- 1/2 C butter
- 1 C Sugar
- 1/2 C flour
Directions:
PreHeat oven to 350 F. Grease muffins Tins. In large bowl combine dry ingredients. Melt the 2 sticks of butter in microwave or pan. Make well in dry ingredients and in this order add; melted butter and sugar. Stir to combine only the wet ingredients without scraping sides. Add eggs and beat into wet ingredients one at a time. Add yogurt, maple syrup and pumpkin (reserve 1 tbs for topping). Fold gently until just incorporated. Do not over mix. Over mixing you eggs will lead to a tougher muffin. In general with baking the less you handle the better. Batter will be lumpy and this is ok! Spoon into muffin tins.
Prepare topping; Melt butter and add remaining ingredients. Stir until mixture resembles a loose crumble. Add more flour or oats if needed. Place a large spoonful on top of each filled muffin tin. Bake for 30-4o minutes or until golden brown.
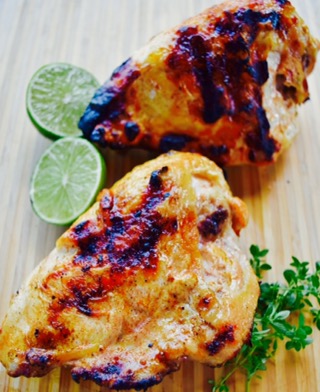 Yogurt is the ultimate marinade for meat. The cultures and acidic nature of yogurt help break down the protein structure in meats, making them tender and flavorful. It serves as a perfect medium to deliver other flavors of your liking to the meat of choice. Our garden is booming, and my favorite herb right now is Thyme. Thyme has a citrus- woodsy taste that I love to use while grilling. My
 pointy bones can poke holes through bag! BBQ on Medium for 25- 35 minutes depending on size, until juices run clear, and internal temperature reads 160 F. Serve with fresh salad or your side of choice!
 I love this pie filling! One because its simple and two because we get to visit


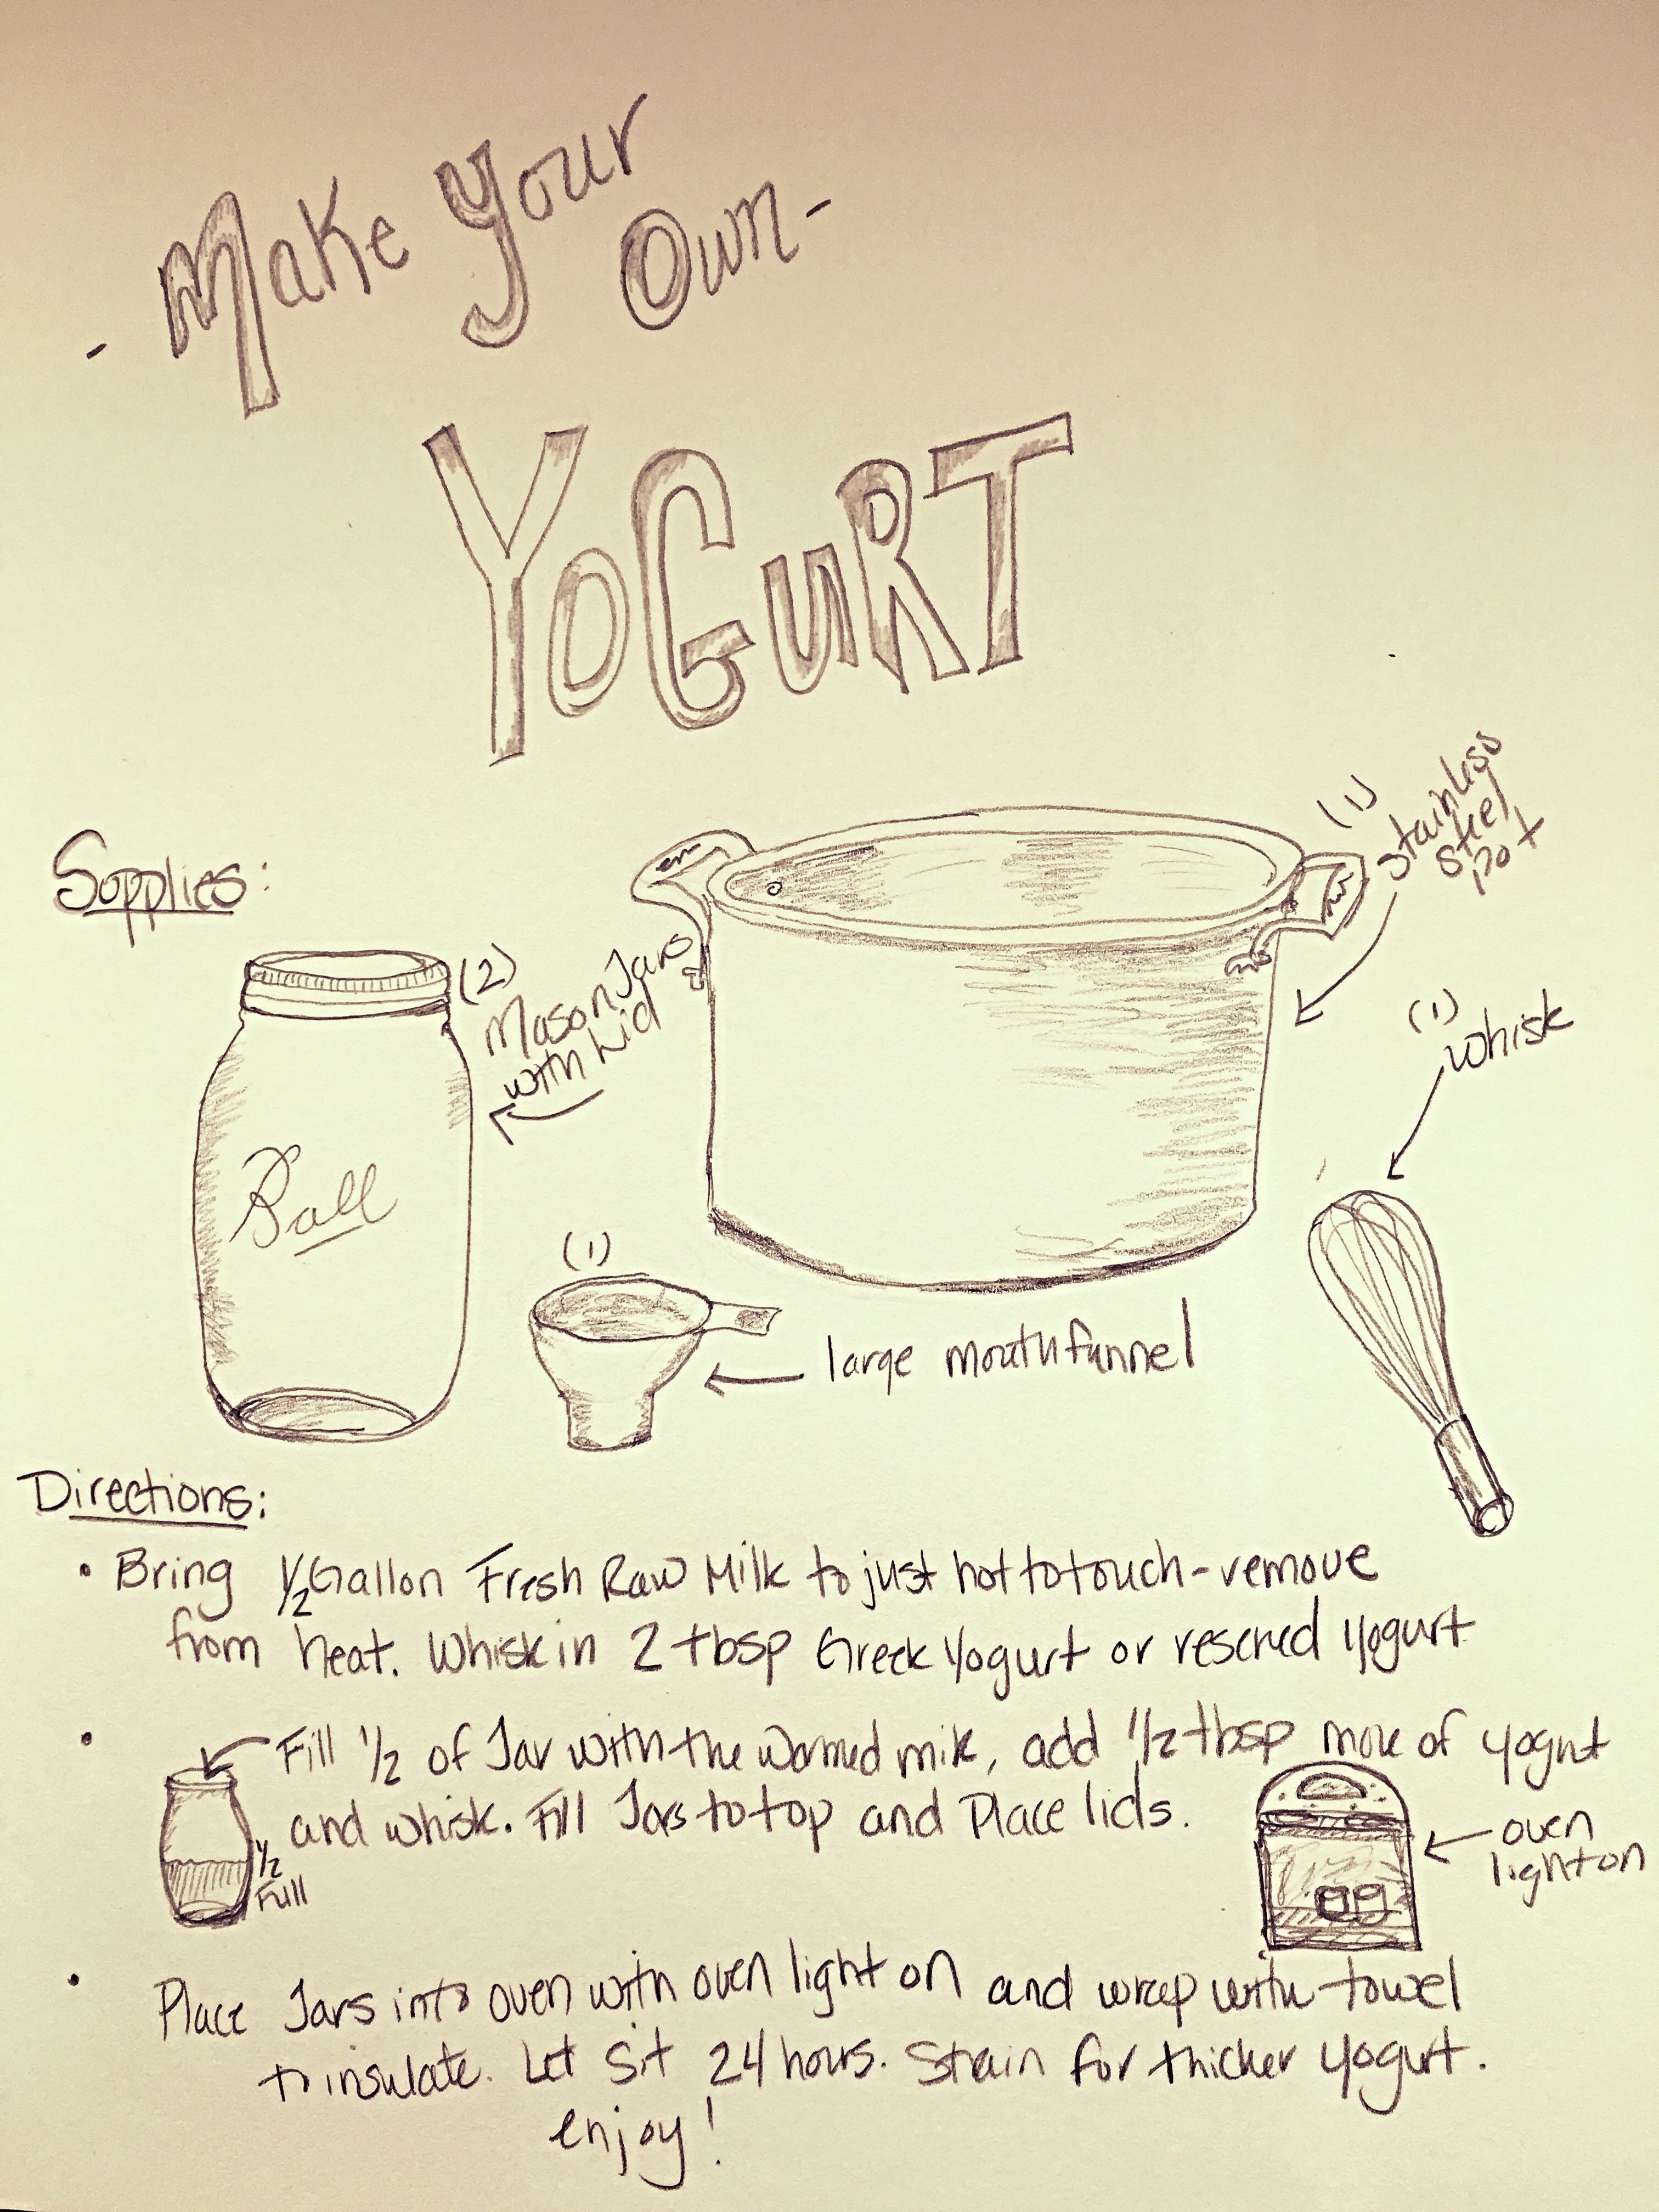
 You won’t believe how easy this is! The trick here- you must have access to raw milk. It’s too bad we don’t have more access to farm fresh milk to make cultured cheese, butter and yogurt. There are many health benefits found in fresh milk that has not been pasteurized or homogenized, thereby retaining its healthy living cultures. To read more bout this visit