
And one fabulous pot I may add! I use my red cast iron dutch oven, which was a wedding gift, ( 8, or is it 7 years ago?), for so many different things throughout the fall and winter months. You could use a crock pot for this as well. This recipe incorporates my yogurt- sweet potato pasta sauce. Since I was out of my sauce I made a batch by roughly cutting up garden vegetables place in pot, cooking through and blending with immersion blender (love this tool!). I then placed the chicken in the sauce and cooked through, so no fuss and less mess for busy week nights! You could substitute a similar marinara. The first dinner I made with this recipe I simply served the chicken over rice.The second dinner I used the leftover chicken, sauce and rice for enchiladas! See directions below and enjoy this simple but satisfying meal! 

Ingredients:
- 6 Boneless, Skinless Chicken Breasts
- 4 C Pasta Sauce
- Salt and Pepper to Taste
- 1 tsp Nutmeg
- 2 Tsp Fresh Chopped Tarragon
 Directions:
Place Chicken Breasts in dutch oven or crock pot. Season with salt, pepper. Cover with sauce. Add tarragon and nutmeg. Simmer for 2-4 hours until chicken shreds easily with fork. Serve over rice of choice.
For Lentil Rice as pictured:
Boil 1 c white rice, 2 c lentils in 3 c water with 1 tbs of butter and 2 tsp of chicken bouillon unit cooked through, (around 50 minutes).
Ingredients for Enchiladas:
- Left over Chicken Breasts with Sauce and Rice (About 2 Qt Total Leftovers)
- 4 C Shredded Jack and Cheddar Cheese.
- 6 Large Flour Tortillas
- 2 15 0z can of Enchilada (Red) Sauce.
Directions:
Pre Heat Oven to 350F. Place 1/2 C Enchilada sauce in bottom of 9″x 13″ dish. Place 1/4 C leftover mixture in tortilla and top with 2/3 shredded cheese. Fold and roll as you would a burrito. Place seam side down in dish and repeat with remaining tortillas. Pour remaining enchilada sauce over rolled tortillas, being sure to get edges as well. Top with Remaining cheese. Bake covered for 30 minutes, remove and bake additional 10 minutes until golden brown and bubbly.

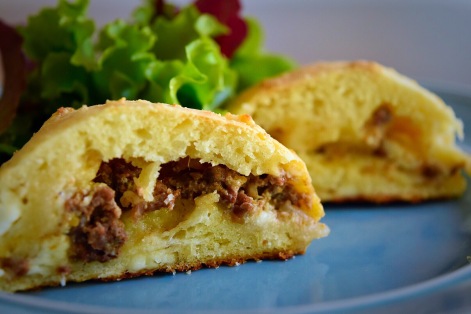 This recipe was inspired by a traditional Georgian bread called “Cheese Bread” I came across the recipe for “Cheese Bread” in my favorite cook book
 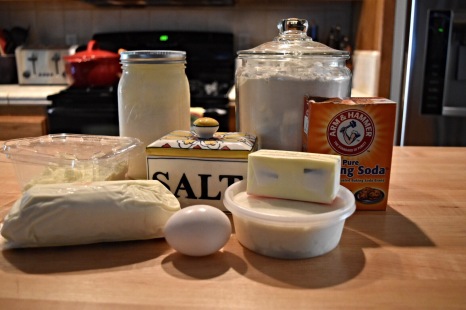 Ingredients:
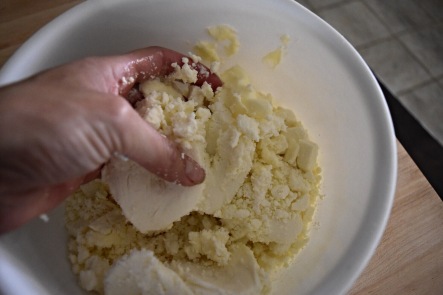 Directions:
 Feel like doing a science experiment? This is such a fun thing to do and with kids or a partner even better! Such a simple cheese to learn. You can get the hang of this after a couple of times and always have fresh ricotta on hand. Use ricotta similarly as you would use yogurt, in baked goods, and of course lasagna. Try with my


 If you think this does not sound good for breakfast, I promise it is perfect for brunch and even for dinner! Yummy fresh layers of cheese, eggs, hash browns all with a light marinara. I found myself making two, a smaller one for dinner and a larger one for a brunch the next day. This is a great make ahead dish, pop it in the oven the next day. I used my home-made
 I painted this pumpkin platter and made these pumpkin muffins in hopes that fall will come early! A portion of proceeds from this platter goes towards your local food bank and can be purcahsed at


 We loaded up the kids to visit the ranch and do some berry picking. Was made all the more exciting as this is rattle snake season- Yikes! Safe to say dad did most the picking! When visiting my parents on the coast we made black berry pie with black berries picked behind pops gallery. That was little more leisurely experience! Either way, using your fresh picked blackberries in this simple dessert the whole family will love! I use my


 This is my favorite way to cook. Letting creativity and spontaneity come together, using everything I have from the garden or extra vegetables after a trip to the farmers market. Easy, simple and never again to be replicated. This is true joy, you will find me in no happier state. A warm pan simmering, smiles and nourished bellies, all feels right and my heart is full. Perhaps it is my yearning for fall, as the kids gear up to go back to school, and sweet potatoes are on my mind! It is time to thin my carrots in garden, and this is an excellent way to use those tiny carrots. Not much prep involved, just cut roughly and throw in what you’ve got! Try and keep tomatoes the main ingredient, sweet potatoes second and after that use to your heart’s content. Carrots, peppers, herbs, celery, onion, garlic all make great choices. I then add my
  Place in blender and blend until smooth. Pour the now smooth mixture into pan and heat. Add yogurt and cheese, stir over medium heat to incorporate.
  Add maple syrup and nutmeg to taste, as well as salt and pepper as desired. Serve over favorite pasta and enjoy!


