
Is this a time that everyone is uncertain? I know my husband and I are. My husband, Jon, his brother Jack and his father are dairy farmers. Their grandfather came from Holland to start this dairy in the central valley region of California. Since their grandfather’s time much has changed and the dairy seems to be on its own little island while all around it things are changing. Clinging to ideals and a passion for dairy farming has kept this dairy alive. Sad to say making a profit in the dairy industry has become increasingly harder. This is due to many factors, cost of production, regulations, cost of labor and a lack of a skilled consistent labor force. Jon and partners have chosen to try robotic milking. After visiting many robotic milking houses in the mid west, Jon and Jack were excited and sure that robotics are the future of dairy farming.

Jon and Jack at Future Robotic Barn Site

The skeleton of the Robotic Barn
My husband will be the first to tell you that we really don’t know if it is. But what we do know is that if we want to continue milking cows something needs to change. We have to at least try, and what are farmers if not pioneers. Every year farmers take risks and bear the elements, battle the ever changing social climate and push forward in hopes to continue a way of life that nourishes our communities and families.
We have a small garden that the kids and I planted at the dairy last year. It did alright, and supplied some employees with fresh lettuce and other veggies. The strawberries we had planted did horrible. At the end of the season I tore out the wilting lettuce, fried zucchini plants and tired peppers, but the strawberries seemed to be greener. I left them and forgot all about the plants during fall and winter. Spring of this year my husband called saying I had better get to the dairy and pick the strawberries. “What Strawberries?” I replied wearily, having just got in from yard work. He informed me that plump, red strawberries littered the old dairy garden spot. As the kids and I returned to the dairy garden I was amazed to see amidst all the weeds were the same strawberry plants, but with fresh glittering red strawberries ready to be picked. we cleaned up the weeds and began caring for and harvesting the strawberries we had given up on. We have picked many times this spring continuing now into summer. Our prayers for our dairy are patient hopeful ones. Prayers that through doing things for the right reasons, not giving up when all seems impossible, nourishing our business then watching and waiting, we will see a sustainable, joyful future for an industry so deserving of a fruitful fate.

Meeting at the new dairy barn

Kids at the barn site
To learn more about robotic milking visit https://www.lely.com/us/the-barn/milking/
 Using our strawberries we made these delicious muffins to share with the dairy employees. I wanted to try something different, a little spice and warmth from the cinnamon, ginger and molasses to contrast the sweet strawberry sauce that tops these buttery muffins. Enjoy!
Molasses and Ginger Strawberry Muffins
Ingredients: Yield: Approx 20 Sauce:
- 2 Pints Fresh Strawberries
- 1/2 C sugar
- 2 Tbs Lemon juice
Muffins:
- 1 1/2 C Whole Wheat Flour
- 2 1/2 C All Purpose Flour
- 1 Tbsp Nutmeg
- 1 Tbsp Cinnamon
- 1 Tbsp Ground Ginger
- 2 Tsp Salt
- 2 Tsp Baking Soda
- 2 Tsp Baking Powder
- 2 Sticks Butter
- 1/2 C Yogurt (Try my Homemade Yogurt Recipe)
- 1/3 C Molasses
- 1/2 C Sugar
- 2 Eggs
Directions:
Pre heat oven to 350 F. Use Pam Baking Spray to prepare your muffins tins. Make the strawberry sauce first. Clean and cut strawberries in half place in large saucepan over medium heat.
Add sugar and lemon juice. Simmer stirring occasionally and until cooked through (approx. 15 minutes). Using immersion blender puree until smooth in pan. let cool slightly and pour into jars leaving about 1/4 of the mixture in pan.
Use the jarred strawberry sauce for other desserts, on top of pancakes or ice cream. May be preserved or frozen for future use.
Using same large pan without cleaning, melt butter slowly on low heat. Stir the melted butter into the strawberry sauce. Add yogurt, molasses and sugar and stir to combine with whisk.
Sift flour, baking soda, salt, baking powder, cinnamon, ginger and nutmeg. Make a well in flour and add the eggs. Stir yokes to break and slowly fold the wet, dry ingredients and eggs to combine.  Drop 1 Tbsp of sauce in bottom of muffins tins. Add 2 large spoonfuls of batter on top. Top with another 1 Tbsp of sauce.
 Bake for 12-15 minutes or until cooked through and golden brown. Remove when slightly cool and transfer to cooling rack. May use right away or freeze for up to 6 months. Enjoy!


 Why is this bread called “Dairy Man’s Dream”? It has cheese, yogurt, milk, and butter! I adapted this recipe from


 I loved this curd with my recipe for


 These Lavender Rosemary Freezer Cookies are not like eating soap, promise. My children can testify! This is a classic butter cookie recipe with simple ingredients, made special by adding a little fresh lavender and rosemary from our garden. I use my home made


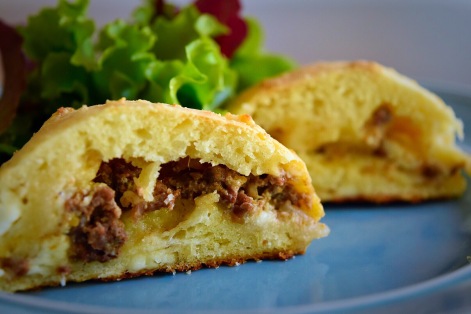 This recipe was inspired by a traditional Georgian bread called “Cheese Bread” I came across the recipe for “Cheese Bread” in my favorite cook book
 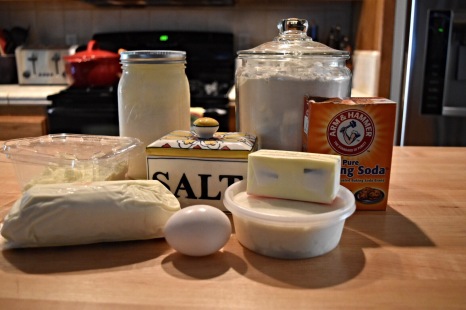 Ingredients:
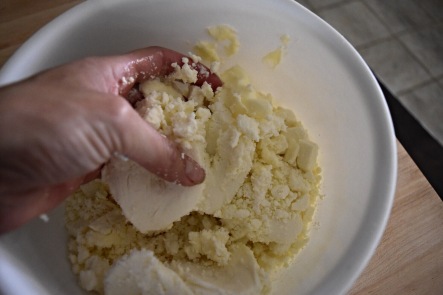 Directions:
 Feel like doing a science experiment? This is such a fun thing to do and with kids or a partner even better! Such a simple cheese to learn. You can get the hang of this after a couple of times and always have fresh ricotta on hand. Use ricotta similarly as you would use yogurt, in baked goods, and of course lasagna. Try with my


 This is my go to salad dressing. I haven’t met any one who doesn’t care for it, including my kiddos. It has a balance of sweet, salty, tangy and the silky texture is divine for any salad. Would also work as a great marinade. Try adding a twist of your own, maybe a hint of heat? I use my home made raw yogurt, you can also use store bought plain or Greek yogurt. We also use our Aunt and Uncle’s olive oil,


